diy: block printing for blockheads…and geniuses
March 25, 2013

photos:
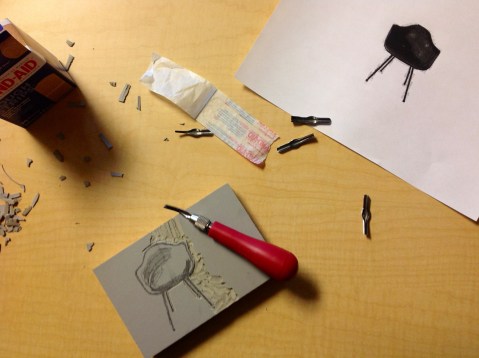
1. starting to carve: image, block, lino cutter, tips and BAND-AIDS!
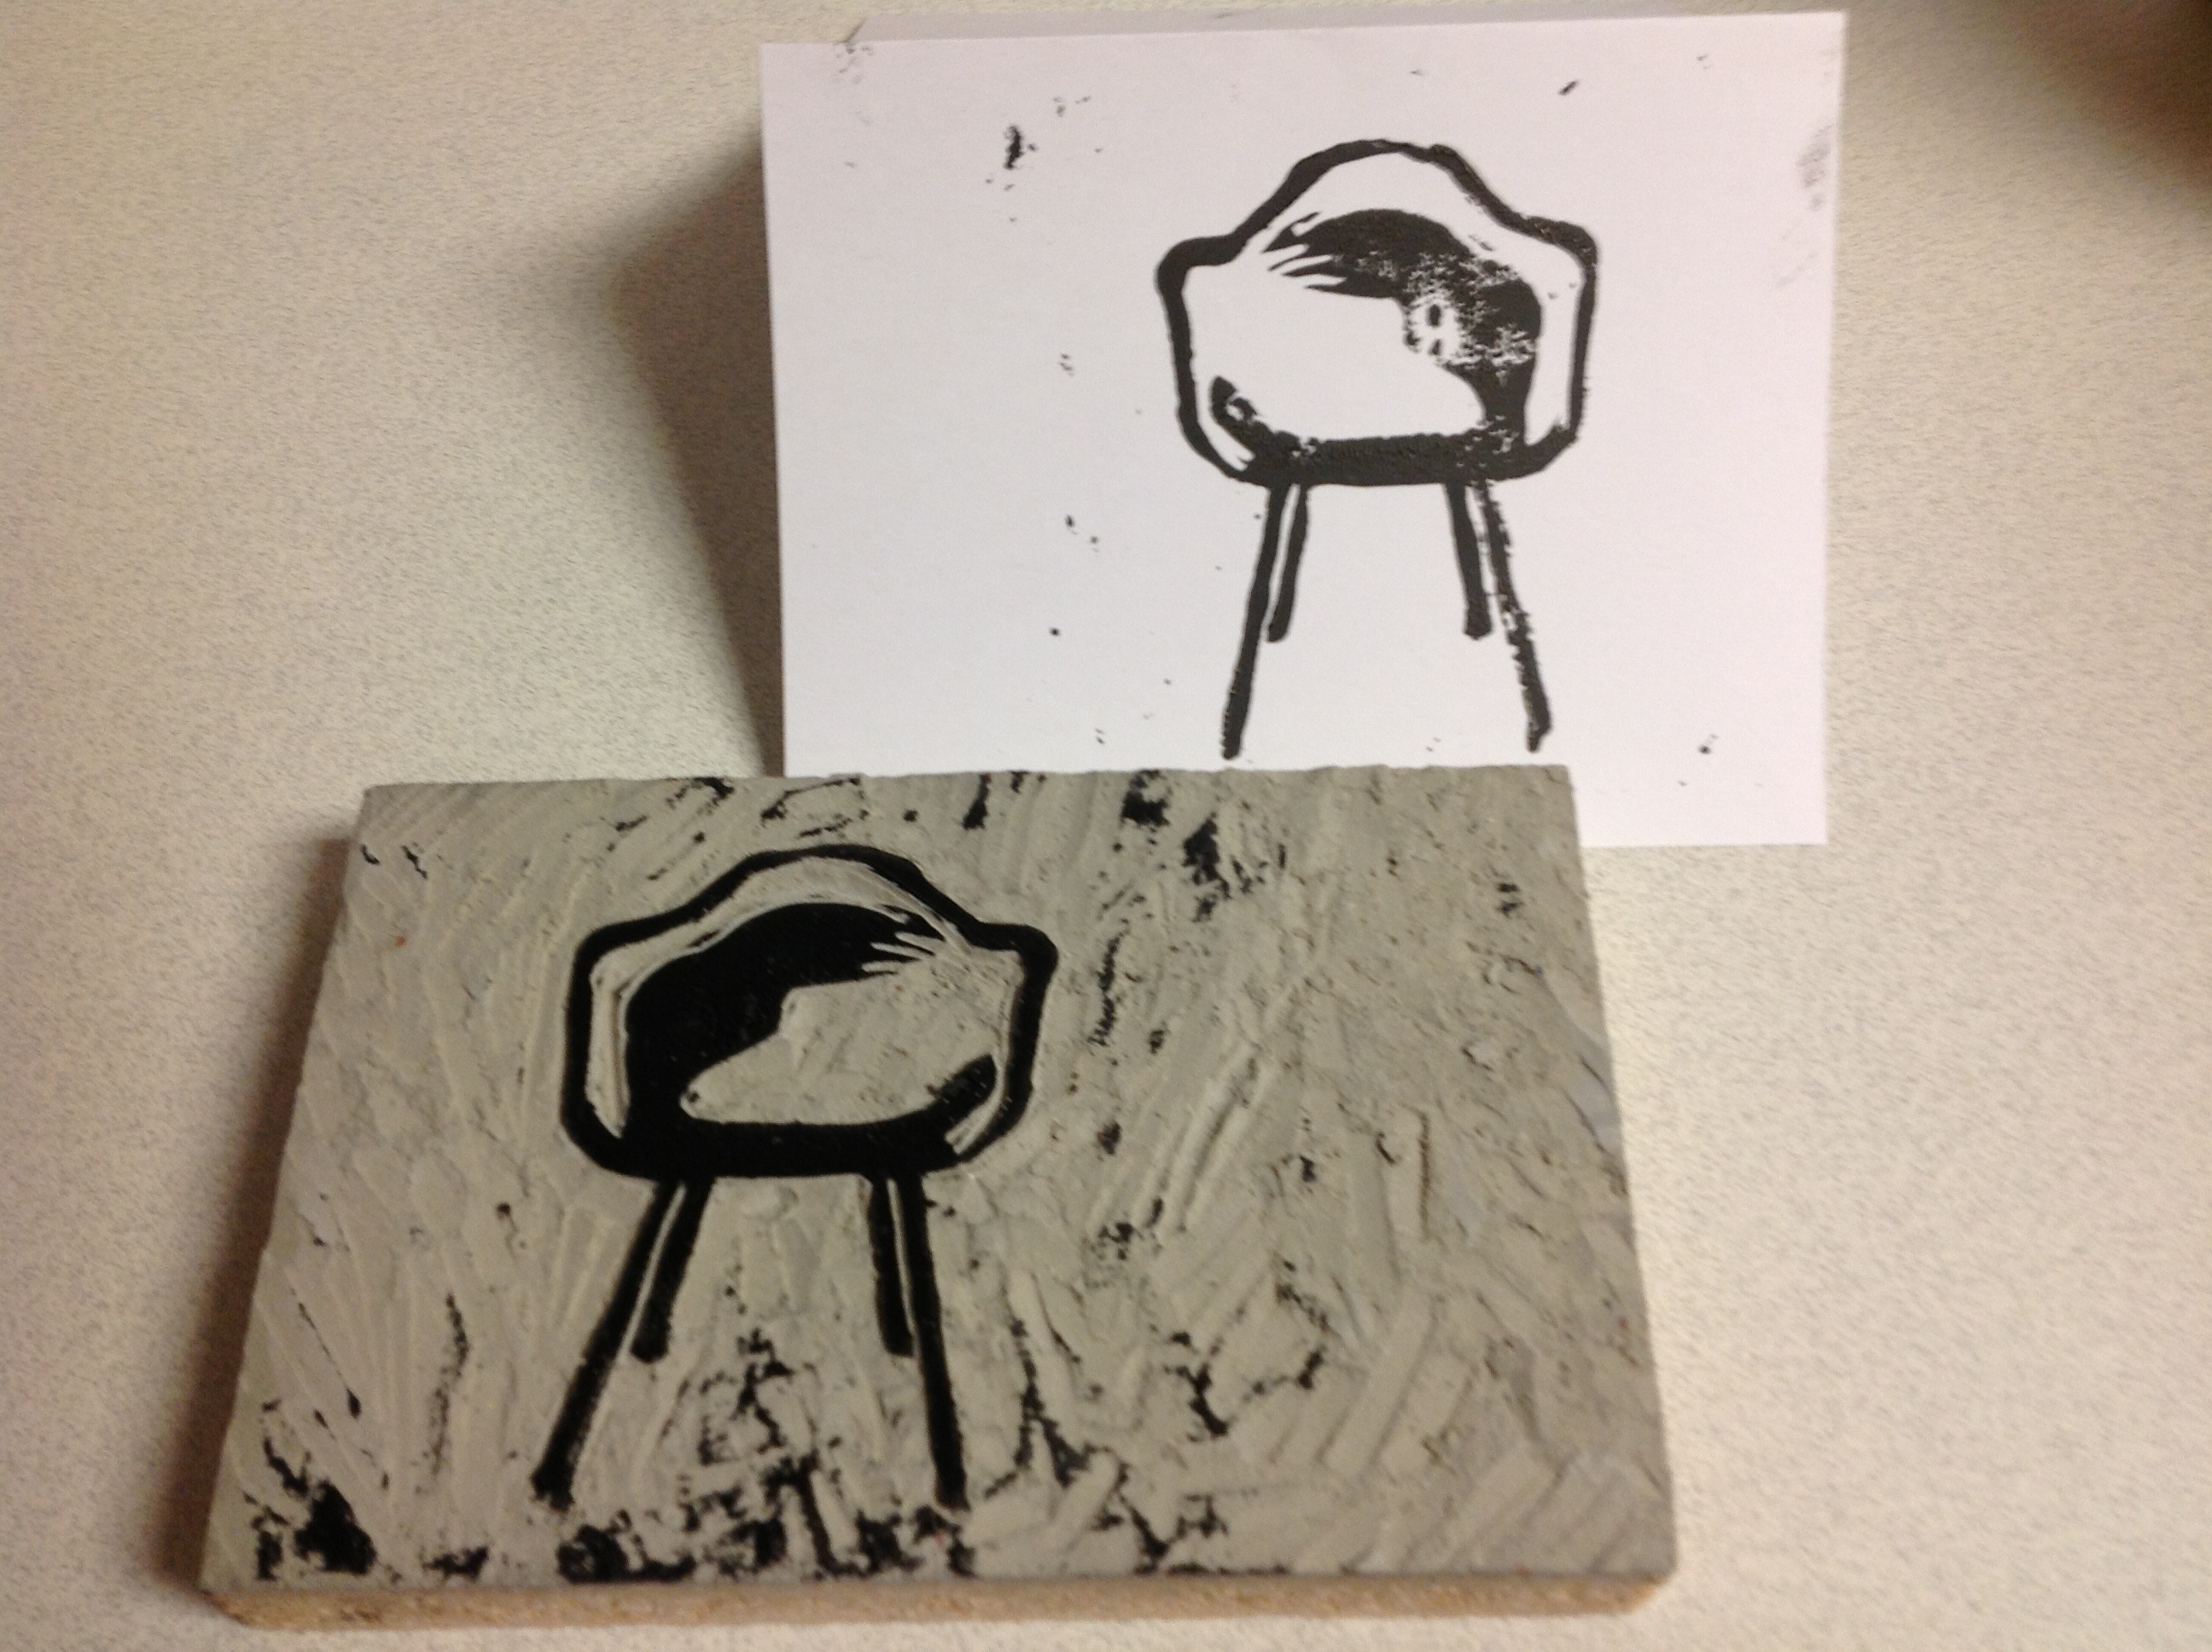
2. final print
3. amazing prints by others who printed with me (not art students, just crazy artistic, and many didn’t even know it!)
Genius or blockhead, linoleum block printing is for you. I promise, if I can do it, so can you! It will make you feel creative and awesome. And once you invest in the basic supplies (about $30), it is pretty cheap to do over and over again.
My print, picture above, is an Eames Zenith chair, in case you’re wondering. My son had no idea what it was. (Aw shucks.) But I really like the way it turned out.
I’ll post the basic how-to here, but there are many great youtube videos that will teach this, so watch a few of those for clarification.
I ordered supplies from dickblick.com, but I hope you can find them locally.
You will need:
• a block (we used 4”x6” for this, but they come in different sizes)
I have used EZ cut blocks, which are really easy to cut, hence the name. And I have used traditional linoleum, which is much harder, more time consuming to cut, but I feel like you can do much more detailed work on the traditional block—plus you get a nice artifact to set on a shelf when you’re finished. If you have never done this before, I would start with the EZ cut block.
• speedball lino cutter
• speedball brayer (ink roller)
• ink
• paper
You will also need newspaper to protect your table, a transparency or cookie tray or something washable to roll ink onto. Scrap paper, pencil, masking tape. There is something called a baren (looks like a hocky puck with a handle sometimes) used to apply even pressure on your paper when it is being inked…but I don’t use one. We used a dry brayer for this, but I think some people use the back of a wooden spoon.
Also important, Band-Aids! I cut myself FOUR times when I was carving, both because I was distracted by helping others, and because I’m super special. I was the only person to cut herself. Super special.
So here are the steps:
1. Getting your image on the block.
Come up with a great idea by looking at things you love, or by searching on “block printing” images online.
Once you have an idea you need to either draw that on to your block, or draw over the image with a pencil, then put your image face down on your block and rub with your nail to transfer the pencil you just applied to your block. You will end up with a faint version of your image, which you can fill in with pencil.
For my chair, I found a picture on the internet, then played with it in Photoshop to try to get it as close to black and white as possible (no shades of gray). You can see by the top image, I lost the shadows in the seat. When I traced the image with pencil, I had to decide where I wanted the shadow that would show the bucket of the seat. I drew over my image very hard with pencil, then flipped it over onto my block and rubbed with my thumbnail. Then I drew over it again, once it was on the block.
Remember that if you include writing, it should be backwards on your block so that when it prints it is the right way.
2. Carving
Once you have your image you will carve away everything that you do not want to pick up ink. So I left the dark parts on my block and carved away everything that did not have pencil on it.
Most lino cutters come with several tips (stored in the handle). The most severe “v” shape tip will give you the finest lines. The broader “u” shaped tip with clear away more linoleum faster.
Be VERY careful about carving away from yourself. Keep your fingers away from the path of your carving tool.
3. Printing
I tape newspapers down to protect my table from ink, then I tape a transparency down for my ink.
Transparencies are easy to wash off and to reuse, and the ink spreads nicely on this surface. But you can use a cookie sheet, or maybe even just the newspaper.
Put about a quarter size glob of ink on the transparency and roll the brayer through it as if you were rolling out dough. It looks like you are trying to spread the ink around, but really you are trying to get a nice even coat of ink across the surface of your brayer. You don’t want to over ink the brayer. Keep rolling until you hear a satisfying tacky sound as the brayer rolls through the ink.
Roll your inked brayer across your block. I re-ink my brayer and roll it on the block a second time to ensure there is enough ink.
Use scrap paper for your first several prints until you get a feel for how much ink you will need to get a satisfying print. You may find that you want to go back and carve a little more to get the print you want.
On my block, I’m not happy with the “noise” around the chair. I like that look for some prints, but I want a little cleaner look for this. So, I will likely go back and carve more of this away (after I wash my block off).
Every block has problem areas where it is difficult to get ink, so try to roll your brayere at various angles across your block when you are inking it. Once you test print, you will see where your problem areas are.
Once your block is inked, I suggest putting the paper carefully on top of the inked block and then running over the paper with a clean brayer, or a hockey puck, or the round side of a wooden spoon. This will ensure the ink is transferred evenly from your block to the paper. I have a large candle with a heavy cardboard sticker on the bottom—I’m wondering if that would work, or rolling a soda can over it…You want to find something that will transfer the image nicely to your paper. Try out a few things to see what works best for you.
You can also try putting your block down onto the paper and then pressing on the block.
You can also get fabric paint and try this on fabric. I haven’t tried it yet.
Good luck and if you do this, please send me links to photos of your prints!
what’s making me happy this week: 03.22.13
March 22, 2013


photos
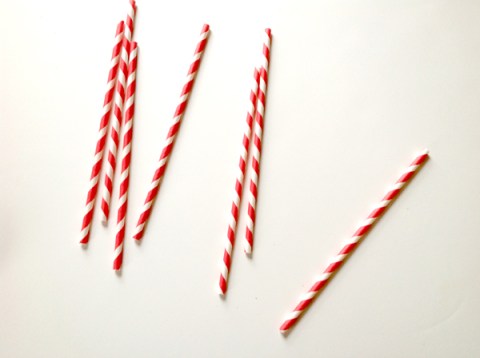
1. red and white paper straws
2. will’s 5th birthday cake, taken and made (both the cake and the boy) by my dear sis
3. pug shaming
Another cold, gray week, with snow always floating in the air. Nothing serious, in fact sometimes it’s so light and fluffy and purposeless that it blows upward, just riding the air currents in front of my window, as if to say, in a creepy, sing-songy voice, “Flooooooraaaa, we’re still heeeere.”
So again, CRUCIAL to focus on the happy!
What’s making me happy this week:
1. Red and white paper straws…I was shopping for lightbulbs.
2. My nephew’s 5th birday cake! I want that NOW!
3. Doing an image search for “pug shaming” and reading the photos—thanks to my dear daughter for this.
4. Family party. I have a big family with several siblings who live too far away. So when one of our prodigal siblings return to Michigan, as happened last weekend, we have a party with my mom, food, sisters and brothers and in-laws and food, cousins, food, nieces and nephews, food, Apples to Apples, food, Just Dance on the Kinect, food, showing each other funny youtubes and food. Plus more food. It is best to avoid politics and religion at these gatherings, so we eat.
5. Flight of the Conchords “Feel Inside (and Stuff Like That)” video. If you don’t know Flight of the Conchords, you NEED to buy their show on DVD (sadly, only 2 seasons).
6. Joy the Baker podcast. Oh these women make me laugh. And a bonus, they help expand my vocabulary— for example “blazing” is a term for wearing a blazer, as in “I am blazing today, so I hope it will be warm enough not to wear an additional coat.”
7. Linoleum block printing. So fun! I’ll post photos tomorrow.
8. One day this week, at my request, my son unplugged from his earbuds, plugged into the car stereo and played this most excellent choice of songs to perk us up (warning it will be in your brain for at least 5 days). Turn the volume up to 11!
9. …which reminds me of the poem, More than a Woman, by Billy Collins, which I just listened to him (BC) read, also making me happy. Reading it here is faster, but taking a minute ot listen to him read it is pretty fantastic.
10. Looking at my blog makes me happy.
Sometimes throughout the day I will just type in this URL and say to myself, “I made that.” It feels good. It is something I wanted to do for a long time, but I wanted to have everything figured out, every piece in place, a plan, a strategy. One day I thought, you will never have time for all that so just jump in and learn as you go. So I did and I am. I just haven’t told too many people yet…
I hope you are able to find something that makes you happy this week and especially today. If not, google “pug shaming”…
