What’s making me happy this week 03.30.13: photos, a pickpocket, and sarcastic waitresses
March 30, 2013


photos:
1. happy card from my daughter
2. minestrone soup
3. Owen Was Here facebook page: Beautiful Detroit
Here’s what’s making me happy this week:
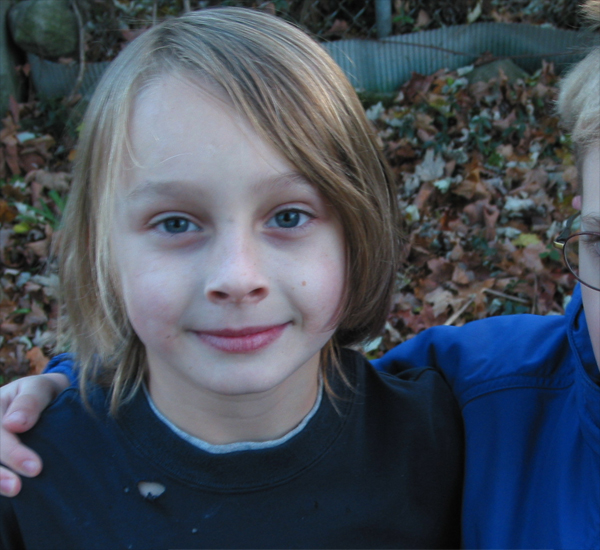
1. A homemade card from my daughter. I love that girl.
2. Minestrone soup. So easy to make and so delicious topped with parmesean and fresh basil. I’m not sure what the definition of superfood is, but I think this might be this.
3. My community college photography class. I will be sorry when it ends, even though I’m pretty sure I’m the worst in the class.
4. …speaking of photography, the Owen was Here facebook page is making me happy. Daily, beautiful, photos of Detroit and Detroiters– refreshing to see Detroit featured in something other than “ruin porn.”
5. Dinner at my friend Suzanne’s house made by her spouse who loves to cook. Beef bourguignon (yes, I did have to look up the correct spelling for that one)– Tres magnifique! As was the company.
6. I’m not sure that I can say Apollo Robbins is making me happy …but he sure is intriguing! I first heard him on NPR’s Wait! Wait! Don’t Tell Me! But he was recently featured in the New Yorker, which I read after hearing him on WWDTM. He is a Las Vegas performer who goes by the subtitle: Gentleman Thief. He is a pickpocket who robs people on stage, even though they know that is exactly what he is going to do. He takes their wallets, scarves, keys, watches, cell phones…and he explains in many videos how he does it.
7. Wait! Wait! Don’t Tell Me…that show always makes me laugh.
8. Getting warmer and sunny here finally! Snow is GONE.
9. …speaking of sun…Ritchie Haven’s version of Here Comes the Sun is making me happy. (The intro is long, stick with it!)
And I say, it’s alright.
10. breakroomstories.com (where restaurant workers post the good, the bad and the ugly stories and photo from the field…) Some of it is raunchy, but a lot of it is very funny.
Be sure to look at the “tip jar” photos.
Sample Post:
Me: “Hi, I’m Megan, I’ll be your waitress tonight.”
Customer: “Well, hi, I’m Joe and I’ll be your customer for tonight”
Oh, the laughs that were had. ._.
-Megan
I love Megan!
what now son?!
March 29, 2013

photos:
1. my boy at 4, he looks just like my sister
2. my boy at 6
3. my boy 15, who will now not let me take and/or publish photos of him
When my kids were little I remember commiserating with a friend about parenting a toddler.
You may be familiar with the frustrations of toddler logic:
If is see it, it’s mine.
If it touched it, it’s mine.
It I want it, it’s mine.
If its yours, it’s mine.
Her advice was, “Just make sure that when someone walks in on you dealing with your toddler, it’s clear which one of you is the toddler.”
Oh how these words have been echoing in my head as I parent my teenage son. He frustrates me so much sometimes…I’m not sure it would be clear to someone walking in on us arguing, who is the teenager and who is the parent.
We are taking a photography class together two nights every week at the community college. We now keep at least one seat between us so we don’t get into any more arguments during class.
I am sure just my presence- that I exist- often drives my son up the wall. It’s the way I felt about my own parents at his age. I remember blaring the Elton John song “The Bitch is Back” when I was mad at my mom. I’m sure it was prompted by her telling me to clean up my bedroom. What a brat I was. (Sorry mom! You know I adore you!)
My friend Suzanne’s daughter is a junior in college and her daughter, with whom Suzanne has a great relationship, recently said to her, “I don’t know why I couldn’t stand you when I was in high school. I really don’t understand what my problem was.”
I do get it, this need for independence. I think it’s tricky for my son because I know he actually likes his parents. He has told me that he likes taking the photography class with me…though I never would have guessed that by his snarky behavior toward me during class. But I get that too.
Last night I was trying to help him format a paper for school and he was frustrated and stressed with how much more work he had to do. He has some crappy word processor on his computer and I was trying to help him figure it out.
I told him there was likely a formatting window, like there is in MS Word, where he could just put in his parameters, and he wouldn’t have to “eye” it. He told me in a mean and snotty way that I didn’t know what I was talking about, that he WASN’T using MS Word! There IS no formatting window!!! His subtext: You’re an IDIOT and I hate you.
Guess what I found a few minutes later. The formatting window.
OH! What now son?!!
(I didn’t actually SAY that, but I THOUGHT it. And he knew it. See, what I mean about not being able to tell who is the teenager? )
This negative interaction went on until I finally said, “Forget it. You’re going to treat me like this while I’m trying to help YOU? Nope. I’m going to bed.” A few minutes later I heard him meekly call down the hallway, “How do I make a citation?” My reply, “Google it.” And I went to bed.
I felt badly lying in bed not helping him when I know he needed help. I knew he was stressed and frustrated, and none of us are at our best when we are stressed and frustrated. But trying to help seemed to only fuel his frustration, and mine.
He and I both need to figure out how to better handle these situations. Sigh. Is it possible to teach your teenager who both loves and hates you how to treat people civilly even when they are completely stressed out? And when I say people, I mean me.
Luckily his ever-patient father arrived home and helped him with the rest of the paper.
My son is a really good guy. He is funny and loving. He apologizes when he should. He marches to the beat of his own drummer, which I admire. He is dyslexic and dysgraphic, so school can be challenging—but he works hard and does very well. He loves learning. He is comfortable with himself. He is comfortable with people of all ages, races, and backgrounds. He still gives his grandmother and aunts and uncles full-on, sincere hugs when he sees them—often towering over them while doing so. I do adore this man-child.
It is tricky business parenting a teenager, and I imagine it is trickier business being one. I supposed if my biggest challenge with this kid is to get him to treat me better when he is tired and frustrated and needs my help…I have it pretty easy.
But I’m not sure that is my biggest challenge with this kid.
My biggest challenge is how I react to his behavior…Ugh. More wine please.
sketchy discovery
March 27, 2013


photos:
1. rocking chair at crystal lake
2. parking meters at train station
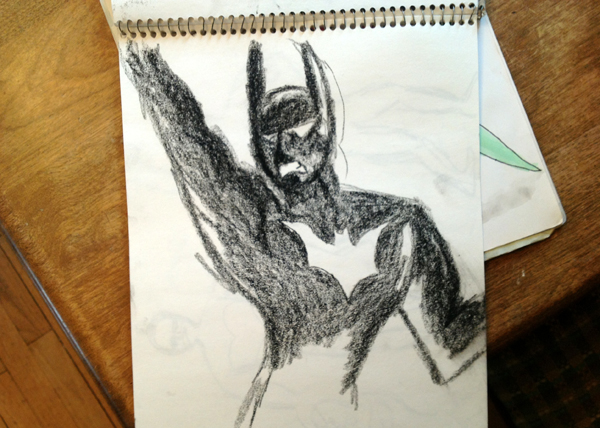
3. batman
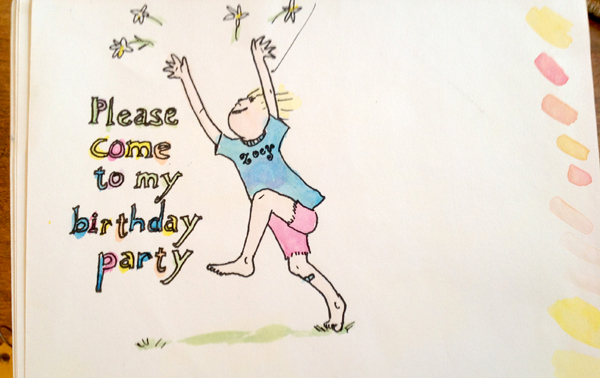
4. 7th birthday party invitation
5. flowers and note on a cozy evening
I’ve been thinking a lot about how to add more artistic endeavors in my life. Last night I had an hour where I could have folded laundry, cleaned a bathroom, read a book, prepped for tomorrow night’s dinner…or made art. I have an unused box of colored pencils given to me for Christmas, sitting forlornly on my dresser for the past 3 months, so I went looking for drawing paper.
In the back of my closet I discovered some old sketchbooks from 8, and more, years ago. It’s hard to believe it’s been that long since I really drew anything other than doodles when I take notes at work. It was a trip down memory lane.
I was taking a drawing class at the Ann Arbor Art Center when I did the pencil drawing of the rocking chair. I don’t really enjoy making realistic drawings of things—I am way too impatient for that, and I like wonky. Besides, if I want a realistic image, I have a camera. But I do think drawing a photo-like image is a good exercise. It helps develop a sense of line, proportion and shadow for other, more wonky, artistic endeavors. And for me, I hope it helps develop some much-lacking patience.
I remember exactly where I was when I made nearly all of the drawings in my sketchbooks.
The rocking chair: done one summer when we were spending a week at my husband’s family cottage on Crystal Lake in northern Michigan.
The parking meters: I was in my car at the train station on a cold winter morning waiting for my friend Cathy to arrive for a visit.
The batman: I drew years ago when I was trying to come up with a cool idea for my son’s Valentine’s day card.
The birthday party invitation: for my daughter’s 7th birthday.
The writing by the flowers says:
8/28/06
Coloring with Z & T
They’re working on
Penny Pioneer coloring
contest…choc chip cookies
just out of the oven..raining out
mmm…nice cozy evening
(Penny Pioneers was a club at our credit union for kids.)
I never did end up drawing with my colored pencils last night! I was too distracted by my sketchbooks, and then by a phone call…Making time for art is a tricky business!
diy: block printing for blockheads…and geniuses
March 25, 2013

photos:
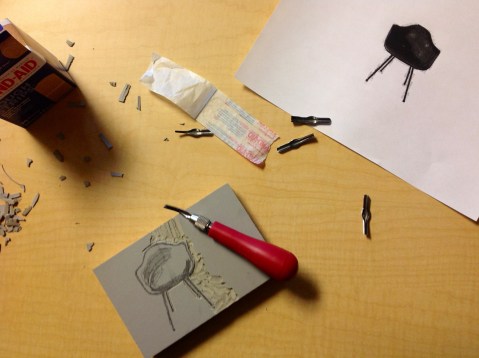
1. starting to carve: image, block, lino cutter, tips and BAND-AIDS!
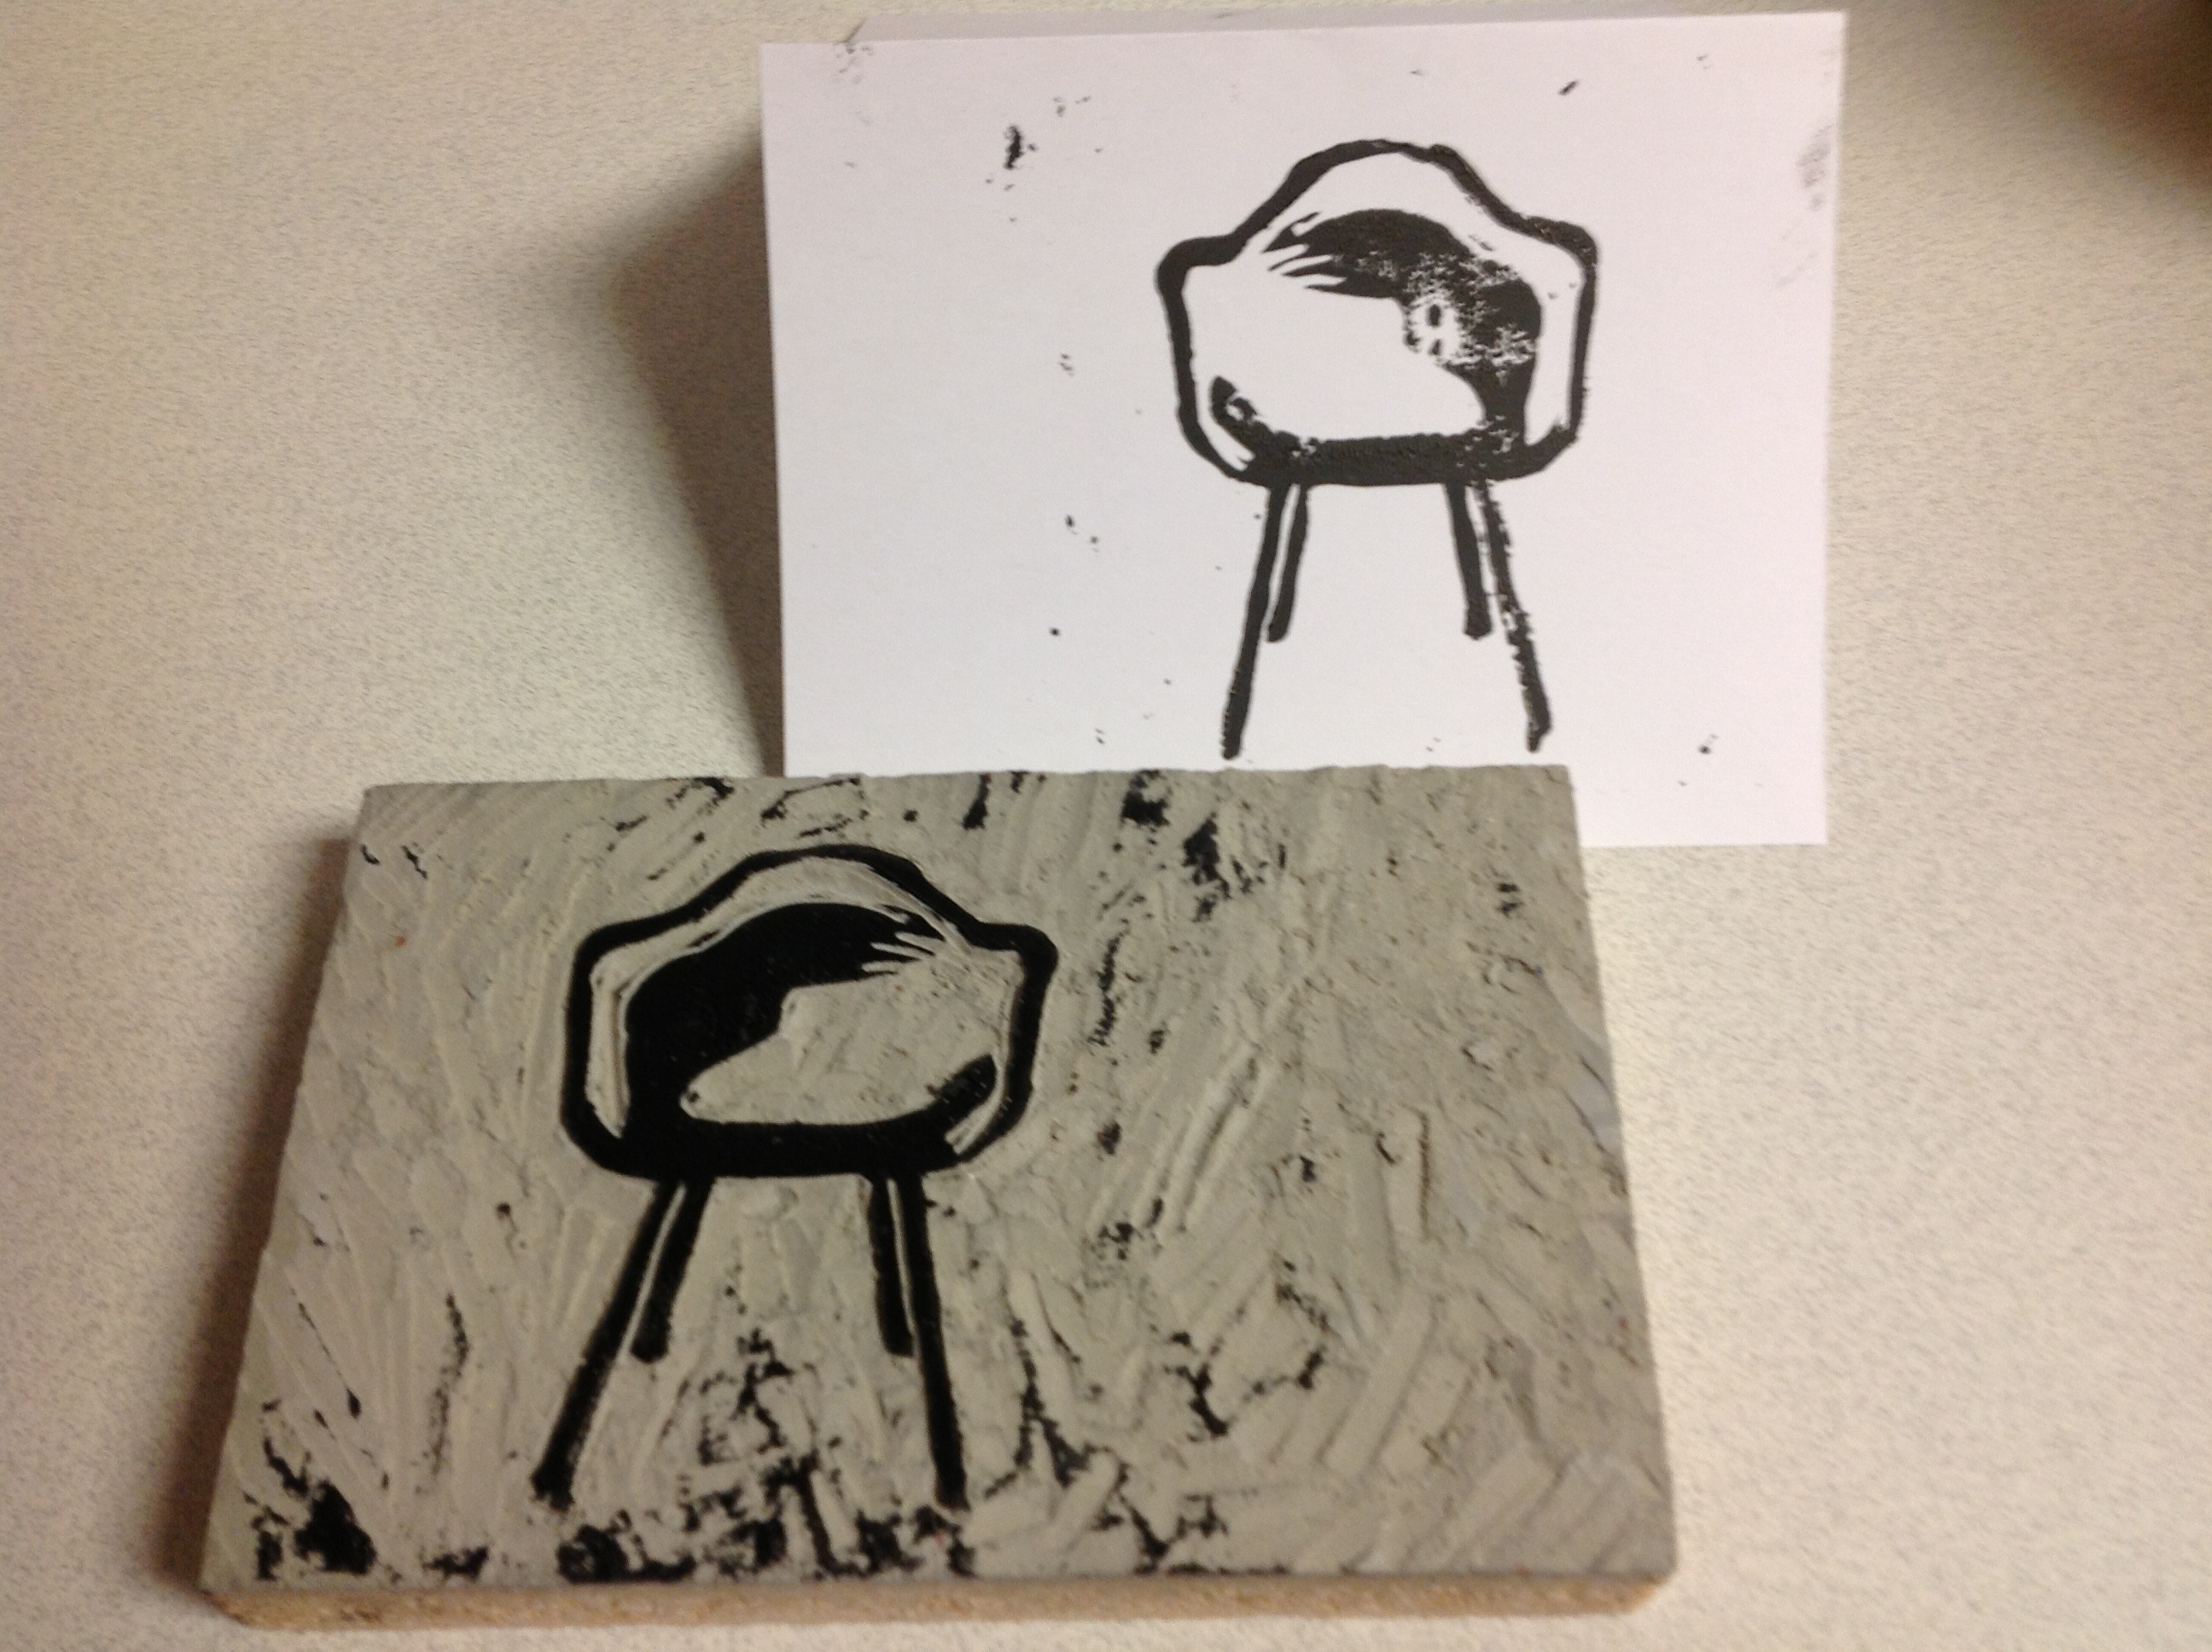
2. final print
3. amazing prints by others who printed with me (not art students, just crazy artistic, and many didn’t even know it!)
Genius or blockhead, linoleum block printing is for you. I promise, if I can do it, so can you! It will make you feel creative and awesome. And once you invest in the basic supplies (about $30), it is pretty cheap to do over and over again.
My print, picture above, is an Eames Zenith chair, in case you’re wondering. My son had no idea what it was. (Aw shucks.) But I really like the way it turned out.
I’ll post the basic how-to here, but there are many great youtube videos that will teach this, so watch a few of those for clarification.
I ordered supplies from dickblick.com, but I hope you can find them locally.
You will need:
• a block (we used 4”x6” for this, but they come in different sizes)
I have used EZ cut blocks, which are really easy to cut, hence the name. And I have used traditional linoleum, which is much harder, more time consuming to cut, but I feel like you can do much more detailed work on the traditional block—plus you get a nice artifact to set on a shelf when you’re finished. If you have never done this before, I would start with the EZ cut block.
• speedball lino cutter
• speedball brayer (ink roller)
• ink
• paper
You will also need newspaper to protect your table, a transparency or cookie tray or something washable to roll ink onto. Scrap paper, pencil, masking tape. There is something called a baren (looks like a hocky puck with a handle sometimes) used to apply even pressure on your paper when it is being inked…but I don’t use one. We used a dry brayer for this, but I think some people use the back of a wooden spoon.
Also important, Band-Aids! I cut myself FOUR times when I was carving, both because I was distracted by helping others, and because I’m super special. I was the only person to cut herself. Super special.
So here are the steps:
1. Getting your image on the block.
Come up with a great idea by looking at things you love, or by searching on “block printing” images online.
Once you have an idea you need to either draw that on to your block, or draw over the image with a pencil, then put your image face down on your block and rub with your nail to transfer the pencil you just applied to your block. You will end up with a faint version of your image, which you can fill in with pencil.
For my chair, I found a picture on the internet, then played with it in Photoshop to try to get it as close to black and white as possible (no shades of gray). You can see by the top image, I lost the shadows in the seat. When I traced the image with pencil, I had to decide where I wanted the shadow that would show the bucket of the seat. I drew over my image very hard with pencil, then flipped it over onto my block and rubbed with my thumbnail. Then I drew over it again, once it was on the block.
Remember that if you include writing, it should be backwards on your block so that when it prints it is the right way.
2. Carving
Once you have your image you will carve away everything that you do not want to pick up ink. So I left the dark parts on my block and carved away everything that did not have pencil on it.
Most lino cutters come with several tips (stored in the handle). The most severe “v” shape tip will give you the finest lines. The broader “u” shaped tip with clear away more linoleum faster.
Be VERY careful about carving away from yourself. Keep your fingers away from the path of your carving tool.
3. Printing
I tape newspapers down to protect my table from ink, then I tape a transparency down for my ink.
Transparencies are easy to wash off and to reuse, and the ink spreads nicely on this surface. But you can use a cookie sheet, or maybe even just the newspaper.
Put about a quarter size glob of ink on the transparency and roll the brayer through it as if you were rolling out dough. It looks like you are trying to spread the ink around, but really you are trying to get a nice even coat of ink across the surface of your brayer. You don’t want to over ink the brayer. Keep rolling until you hear a satisfying tacky sound as the brayer rolls through the ink.
Roll your inked brayer across your block. I re-ink my brayer and roll it on the block a second time to ensure there is enough ink.
Use scrap paper for your first several prints until you get a feel for how much ink you will need to get a satisfying print. You may find that you want to go back and carve a little more to get the print you want.
On my block, I’m not happy with the “noise” around the chair. I like that look for some prints, but I want a little cleaner look for this. So, I will likely go back and carve more of this away (after I wash my block off).
Every block has problem areas where it is difficult to get ink, so try to roll your brayere at various angles across your block when you are inking it. Once you test print, you will see where your problem areas are.
Once your block is inked, I suggest putting the paper carefully on top of the inked block and then running over the paper with a clean brayer, or a hockey puck, or the round side of a wooden spoon. This will ensure the ink is transferred evenly from your block to the paper. I have a large candle with a heavy cardboard sticker on the bottom—I’m wondering if that would work, or rolling a soda can over it…You want to find something that will transfer the image nicely to your paper. Try out a few things to see what works best for you.
You can also try putting your block down onto the paper and then pressing on the block.
You can also get fabric paint and try this on fabric. I haven’t tried it yet.
Good luck and if you do this, please send me links to photos of your prints!
what’s making me happy this week: 03.22.13
March 22, 2013


photos
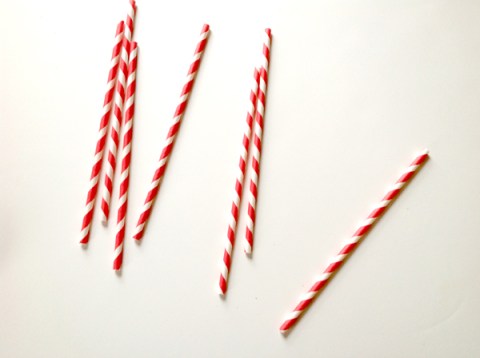
1. red and white paper straws
2. will’s 5th birthday cake, taken and made (both the cake and the boy) by my dear sis
3. pug shaming
Another cold, gray week, with snow always floating in the air. Nothing serious, in fact sometimes it’s so light and fluffy and purposeless that it blows upward, just riding the air currents in front of my window, as if to say, in a creepy, sing-songy voice, “Flooooooraaaa, we’re still heeeere.”
So again, CRUCIAL to focus on the happy!
What’s making me happy this week:
1. Red and white paper straws…I was shopping for lightbulbs.
2. My nephew’s 5th birday cake! I want that NOW!
3. Doing an image search for “pug shaming” and reading the photos—thanks to my dear daughter for this.
4. Family party. I have a big family with several siblings who live too far away. So when one of our prodigal siblings return to Michigan, as happened last weekend, we have a party with my mom, food, sisters and brothers and in-laws and food, cousins, food, nieces and nephews, food, Apples to Apples, food, Just Dance on the Kinect, food, showing each other funny youtubes and food. Plus more food. It is best to avoid politics and religion at these gatherings, so we eat.
5. Flight of the Conchords “Feel Inside (and Stuff Like That)” video. If you don’t know Flight of the Conchords, you NEED to buy their show on DVD (sadly, only 2 seasons).
6. Joy the Baker podcast. Oh these women make me laugh. And a bonus, they help expand my vocabulary— for example “blazing” is a term for wearing a blazer, as in “I am blazing today, so I hope it will be warm enough not to wear an additional coat.”
7. Linoleum block printing. So fun! I’ll post photos tomorrow.
8. One day this week, at my request, my son unplugged from his earbuds, plugged into the car stereo and played this most excellent choice of songs to perk us up (warning it will be in your brain for at least 5 days). Turn the volume up to 11!
9. …which reminds me of the poem, More than a Woman, by Billy Collins, which I just listened to him (BC) read, also making me happy. Reading it here is faster, but taking a minute ot listen to him read it is pretty fantastic.
10. Looking at my blog makes me happy.
Sometimes throughout the day I will just type in this URL and say to myself, “I made that.” It feels good. It is something I wanted to do for a long time, but I wanted to have everything figured out, every piece in place, a plan, a strategy. One day I thought, you will never have time for all that so just jump in and learn as you go. So I did and I am. I just haven’t told too many people yet…
I hope you are able to find something that makes you happy this week and especially today. If not, google “pug shaming”…
claiming creative space
March 20, 2013
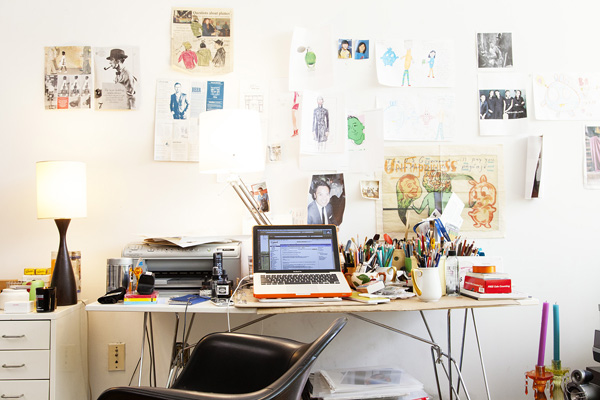

photos:
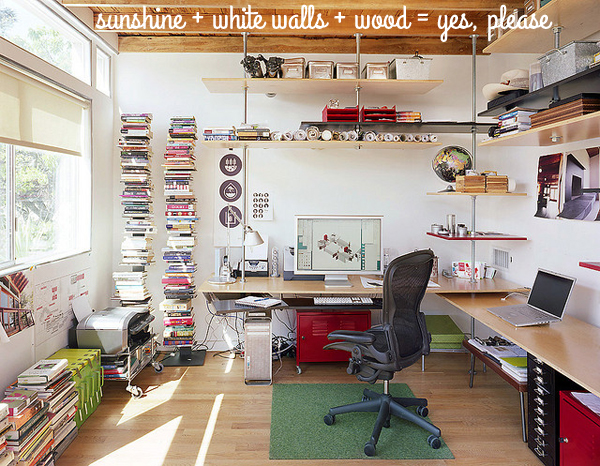
1. forcebeyondcapacity.com
2. the selby, richard haines
3. collaboratephilly.com
Been thinking about “claiming” a creative space for myself in our house.
Currently, when I work at home I generally work on our dining room table, often pushing placemats and napkins or someone else’s books or mail out of the way.
We do have an office space in an open area on our second floor, but my husband uses that space and it makes me insane how messy, ugly and disorganized it is.
I don’t need anything big and fancy. Just a clean, non-distracting, inspiring space of my own. I’ll keep you posted on my progress.
hedgehog: real talk
March 19, 2013


photo credits (all taken by my daughter):
1. dandy showing off his sniffer
2. dandy in the dandelions, smiling?
3. dandy goes to college
please ask permission before using any photos
Meet Dandelion, my daughter’s pet. She had him at school with her for a few weeks, but he was too noisy at night so he’s back with us. She took these amazing photos with a tiny Canon Powershot pocket camera– smaller than an iPhone. Talented lady.
A couple of weeks ago I warned against getting a pug for a pet. I didn’t mean it. You know that. I meant it to prepare you for the joys of pug ownership—real talk.
However, I do mean it when I say don’t get a hedgehog. Really, this time I’m serious.
Hedgehogs are cute and interesting, but that wears out after a few weeks. What you’re left with is a cage to clean weekly, and even worse, what our family so crassly calls, “the wheel of poop” to clean.
Hedgehogs are nocturnal and are used to traveling miles at night. So, at night, Dandy gets on his wheel (unlike a hamster, wheel this one is solid) and he runs and poops all night long. His food has molasses in it. Nuff said.
They really don’t like people. When touched, they puff up into a painfully spiky ball and huff and jerk in a small, sudden way to try to spike you. If you leave them alone they will calm down and then they walk around (and poop randomly while walking) and explore— just don’t touch. You can put them on your lap, or hold them in your hand— as long as you are not touching their spikes, they relax and will start poking around with their noses. What they are looking for is a small dark hole to hide in- a way to escape from YOU.
If you ever want a hedgehog reality check, let me know. We will need someone to take care of Dandy when we go on vacation this summer. We will bring his cage, his food, protective gloves, the wheel of poop, and a wire brush and small chisel for cleaning it.
my red purse
March 18, 2013


photos:
1. my $6 vintage purse
2. TheVintageMistress (item sold), http://www.etsy.com
3. AbslewtlyVintage, http://www.etsy.com
4. ChicVintageWear, http://www.etsy.com
It is getting close to time to replace my lovely red handbag. I use this bag every day, and it shows. I have already glued one rip in the backside, and now it has sprouted another at the bottom. Sigh. I love this bag. I makes me happy to look at it.
I bought this bag at an antique mall for $6 in Appleton, WI when I was visiting my dear friend Cathy. (Who later sent me an amazing vintage navy bag, which is smaller and I use for dress up. What a wonderful surprise to receive in the mail!).
I receive compliments on my red bag wherever I go, and often hear stories about other vintage handbags. One sales woman told me she had inherited her mother’s vintage handbags and found in each one a color-coordinated switchblade. She knew her mother lived in a very bad area and had to walk to and from work each day, but she never knew about the switchblades. She said it was very hard to image her proper mother, who dressed to the nines, carrying a switchblade. It was not so surprising that they were color-coordinated.
That story made me grateful for much more than just a pretty handbag!
what’s making me happy this week: 03.15.13
March 15, 2013


Photos:
1. my girl, bell’s diner
2. http://www.drawnandquarterly.com/blog/2007_05_01_archive.php
3. office white board dino (by dear daughter)
It has been a very long week, which included a Friday night and all day Saturday work event, and a note on my neighbor’s car apologizing for backing into it and taking out the headlight. (I may sound cavalier, but I’m still sick about it.)
It included saying goodbye to my daughter as she headed back to school after spring break; switching to daylight savings time— spring forward! Not as fun as it sounds; and a warm, promising, sunny Sunday followed by freezing rain, snow, cold and a reminder that we live in the Midwest and what suckers we are to think the snow was over.
All the more reason to focus on the happy!
What’s making me happy this week:
1. Pop Culture Happy Hour podcast—from which I shamelessly/fully stole the title “what’s making me happy this week”
I don’t always agree with this group of NPR culture nerds (Linda liked the Les Mis movie? Wah???) but I adore them from afar, and am always taking notes for interesting stuff to explore. (p.s. “nerd” is a term of endearment and highest praise in my world.)
2. The musical Next to Normal at Meadowbrook Theater. Almost as fantastic as seeing it on Broadway three years ago (see how I dropped that in there? See how cool I am?). Three Tonys. One Pulitzer. Productions are popping up around the country since the book was released last year. Really, if you have the chance, see it. You will not be disappointed. Watch the youtube videos for a taste. Did I mention it’s about mental illness, family dysfunction and loss? All the characteristics of a great musical!
3. Bob Loblaw’s Law Blog. Why? Because Arrested Development always makes me happy.
4. Bi Bim Bop (at Bell’s Diner, with my girl)
5. This Boden sweater I preordered months ago on sale finally arrived (and if I were being compensated for this mention, I would be even happier! but I’m not…compensated.)
6. Lynda Barry at the Michigan Theater. Cartoonist, playwright, artist, teacher, therapist? now neuroscientist? In her introduction yesterday she was described using the m&m lyric, “when a tornado meets a volcano.” Years ago, my kids and I wrote a list (still on our refrigerator) of 10 people living or dead we could invite to THE GREAT dinner party. Lynda was, and is, at the top of my list. Yesterday, I listened to her wisdom and humor. In person. In the gorgeous, historic Michigan Theater. Good day.
(She was here in AA as part of a FREE lecture series—next week Ken Burns. Mossimo Banzi is coming soon- 50 extra points to anyone who knows who this is!)
7. My son singing every word of “the devil went down to Georgia” to me while driving in the car because he can memorize anything after hearing it once and because him singing this song in a Charlie-Daniels-badass way makes me laugh.
8. Sharpies. I’ve been making my “to do” lists with them this week. Oh so satisfying.
9. My nephew Will’s 5th birthday.
In his words, “Hope you get a great day!”
Growing up too fast and too far away. That boy has a special light that shines in him.
10. The dinosaur with braces drawing on my office dry erase board.
I hope you have much that is making you happy this week. If not, pick up a sharpie and make a list, or doodle…I promise it will help.
diy: pretty flower bracelets
March 11, 2013


When my daughter was home on break last week we had a long list of projects we wanted to try. These bracelets were one of the few we got to!
I saw this project on the Oh Joy! Blog and wanted to give it a try: {Valentine’s Day} Floral Friendship Bracelets…
We are so ready for spring and those flowers are so pretty!
We changed a few things:
1. We didn’t have the time (or the production team) to dip dye the ribbon (though I do like that effect).
2. Instead of using real flowers, we used artificial so the bracelets would last. Finding artificial flowers for this was not as easy as I had expected. I found some papery flowers in the scrapbooking section at Michaels, and we bought a bunch of coral flowers that were on a plastic stem. We pulled them off and pulled out the plastic stamen that attached them to the stem leaving just the fabric flower. I don’t think I would use the paper ones again. I had worn the yellow one (paper flowers) to work before I took the photos and they had been in and out of my coat sleeve a few times and look a little worse for the wear.
3. Instead of using hot glue, we hand stitched the flowers to the ribbon. Not pretty on the backside. This can be covered with another ribbon for those who have the time!
4. My daughter used a snap fastener on the back—which is much more practical than tying a bow. I think I will do that with mine, which I now depend on someone to tie on me (and the long ribbon ends are not great when you are using the ladies’…)
5. We singed the ends of the ribbon in a flame (grill lighter) to keep them from fraying (a tip my mom learned from Martha Stewart).
Once you have the supplies, these are quick and easy to make!
